Firstly, apologies in advance for the bad photos, especially anyone who is here for pretty scenic views, you might just want to ignore this post ;)
So I thought I would have a stab at Rochelle's
Sew for Victory challenge this year. I love historic fashion, and the 1940s has some particularly appealing shapes. I'm attempting to recreate a scallop fronted dress seen in one of the
free downloads Rochelle has released (the green dress on page 5 if you have it). I'm using the
Colette Hawthorn pattern, which I have sewn before
(pic here), and getting creative with the modifications.
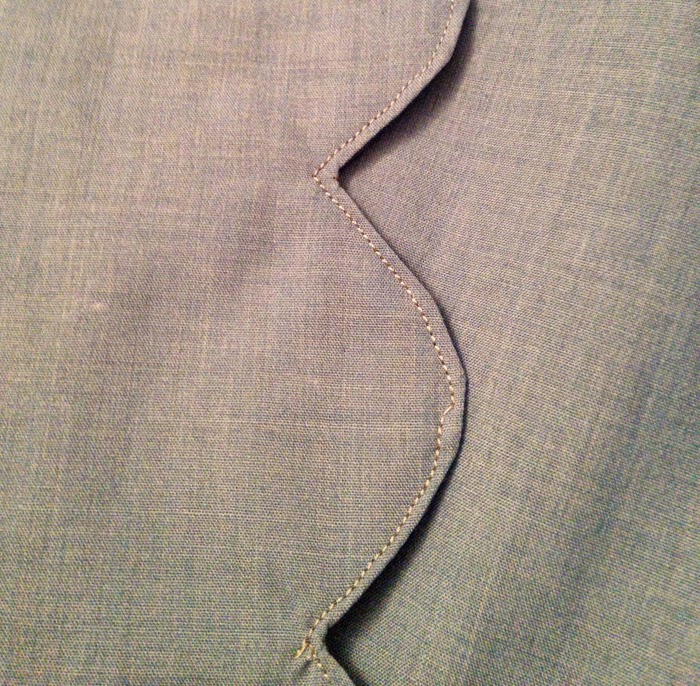
This is a first attempt at a muslin of the bodice. I've altered the neckline, added a scallop detail to the button band, and changed the shape of the sleeve and the cuff design. This is all a bit new to me and I have been making it up as I go along, so any advice would be greatly appreciated!
Here is a (bad) photo of the full view, on:
I am quite pleased with the neckline alteration. There are bust dart issues, which seems to be a usual problem for me. They are always too pointy! I think the scallops are working quite well, but I am very much open to suggestions! The original dress only had 3 scallops between the waist and the bottom of the neck opening, so maybe I should make them bigger? I'll make the two sides of the neckline mirror each other, I was just experimenting with the scallop shape.
The scallops are a little messy, but I think that would be improved by more careful sewing, and better fabric.
I used facing and topstitching on the scallops, is this a good technique or is there something better? it was hard to get the points between them neat. Anyone know if topstitching was used in the 40s?
I also used a facing for the cuff, but I'm really not sure this is the best way, as it wants to turn in the wrong way as soon as I put my arm in the sleeve. The point is even sharper than on the button band scallops, so it is even messier!
So, sewing gurus, advice and feedback would be fabulous! I still need to pick out a fabric to make up the final version, I'm not sure whether to go for a plain or floral, decisions decisions...


Hey I hit you up on twitter too, but hey only 140 characters, so heres the rest. I think you need to lower the waist dart about an inch and a half, thats my estimate from your photo. if you put it on inside out mark the point you would like the dart to start from on your dominant side (right handed or left handed), then release that dart. While looking in a mirror pinch out and pin a new dart from the point you marked to the waist. It may get wider than it was at some points but that's ok.
ReplyDeleteI think that you should go down to the three scallops over the bust. If you do this you may find a little gap here or there along the bust line. The solution here is place small snaps in between the buttons along the facing. This will allow you to achieve the look you want without having to be too concerned about someone trying to sneak a peek.
Finally the top stitching. I would suggest you try a sample of under stitching. It may be finicky but I think you will like the result. This is a pretty decent tutorial from Sewaholic:
http://sewaholic.net/understitching-a-step-by-step-demo/
The trick with top stitching is it has to be so on point that it can be infuriating. You could also clip and press really well and then catch stitch your facing in place. Also your buttons will anchor you scallops and facings.
One other thing to think of is that you only need to scallop the side that will have the buttonholes on it. You'll have to do both sides of the neckline but not the center front closure.
Sorry that was a bit long winded but I had a bit to say. I love your choice for your garment. Can't wait to see how it comes together